Syncing Student Email
Because WSU sends official communications to your student email, it is crucial that you check it often. Here are some tips for how to check your email on various devices and even sync your email and Canvas calendar to your preferred accounts or programs to more efficiently stay informed and organized.
Gmail App .svg.png/320px-Gmail_icon_(2020).svg__40x30.png)
.svg.png/320px-Gmail_icon_(2020).svg__40x30.png)
The easiest and simplest way to check your student email is to use the Gmail app on your Android or iPhone/iPad.
Android
- Open the Gmail app (if this is your first time using the app, skip to step 4)
- Tap the icon in the upper-right corner
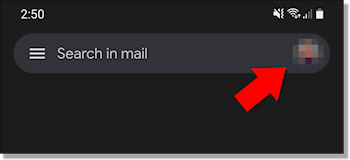

- Tap "Add another account"
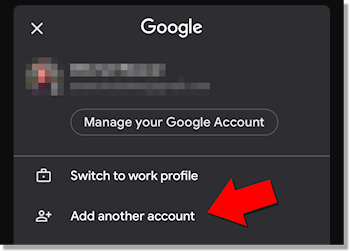

- Tap "Google"
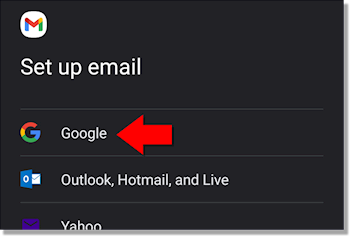

- Enter your full email address ending in @mail.weber.edu, and then tap Next

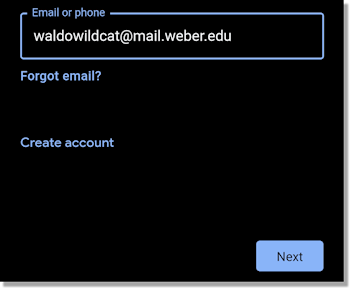
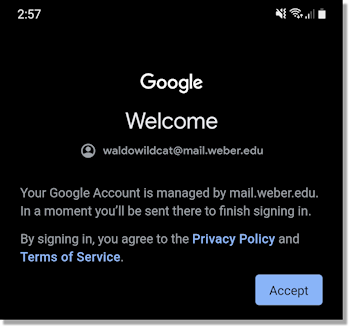
- Tap Accept on the next screen

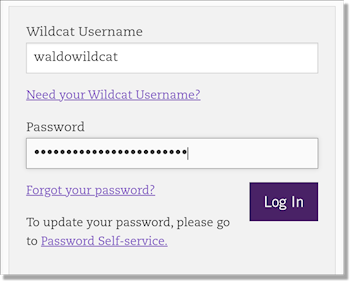
- Enter your Wildcat Username and password, then tap Log In

Congratulations, you can now use your phone to send and receive student emails!
iPhone/iPad
- Open the Gmail app (if this is your first time using the app, tap the Sign In button after opening the app and skip to step 4)
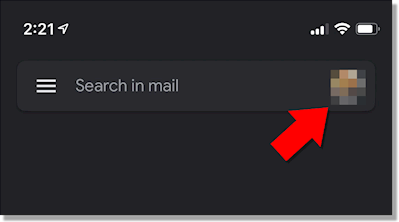
- Tap the icon in the upper-right corner

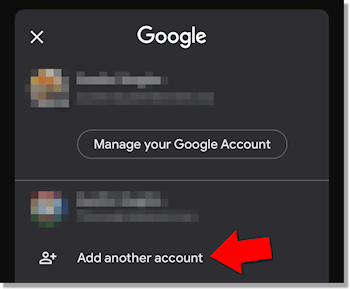
- Tap "Add another account"

- Tap "Google"


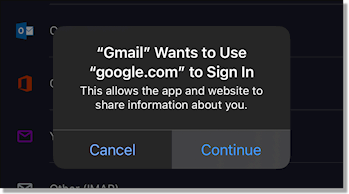
- Tap Continue at the prompt

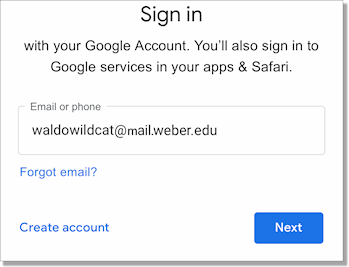
- Enter your full email address ending in @mail.weber.edu, then tap Next

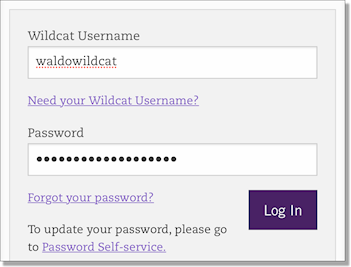
- Enter your Wildcat Username and password, then tap Log In

Congratulations, you can now use your phone to send and receive student emails!
Outlook .svg.png/270px-Outlook_hi-res_icon_(2019).svg__40x36.png)
.svg.png/270px-Outlook_hi-res_icon_(2019).svg__40x36.png)
- Open Outlook (if you already use Outlook, click File and then Add Account)
- Enter your full email address, ending in @mail.weber.edu then click Connect

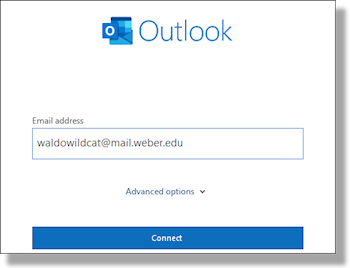
- If prompted, enter your Wildcat Username and password
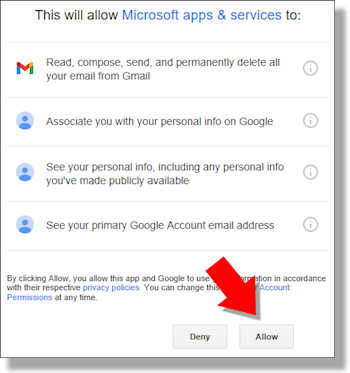
- On the next screen, click Allow at the bottom (you may need to scroll down)

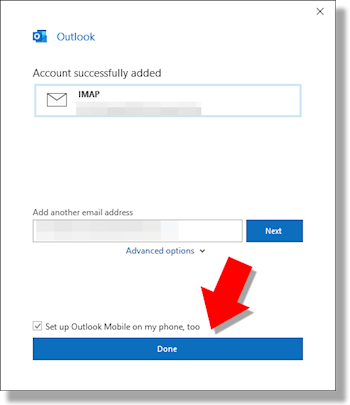
- On the last screen that says "Account successfully added", click Done at the bottom of the window

Congratulations, you can now use Outlook to send and receive student emails!
Apple Mail 

- Open the Mail app (if you already use the app, click on Mail then Add Account)
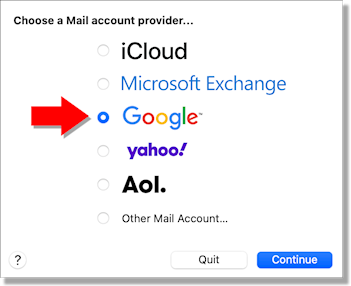
- Select "Google" and then click Continue

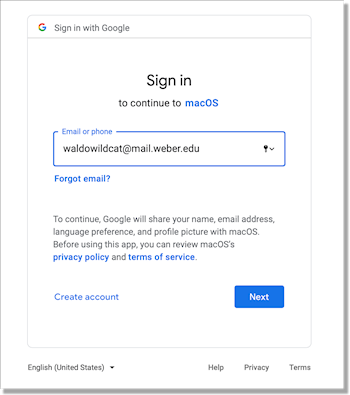
- Enter your full email address ending in @mail.weber.edu and then click Next

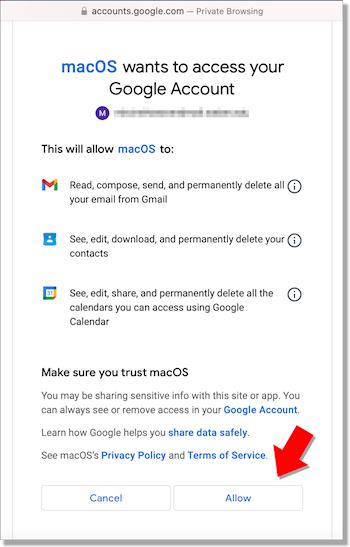
- At the bottom of the next screen, click Allow

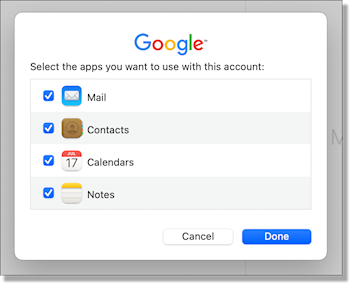
- Finally, choose which of the apps you woud like to sync with your student accound and click Done

Congratulations, you can now use the Mail app to send and receive student emails!
Forward your student emails
This method will send a copy of your student emails to another address of your choice. It will help keep you informed, but remember that you will still need to log into your student account in order to send emails, and you must send official communications with WSU or requests through your student email
- Log into your student email from a desktop or laptop browser
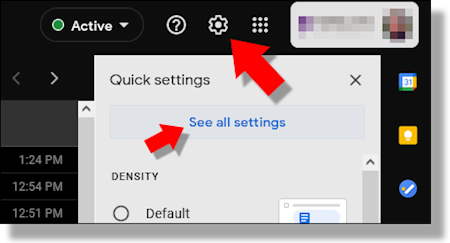
- In the upper left of the screen, click the gear icon , then click See all settings
- Across the top, click Forwarding and POP/IMAP, then click Add a forwarding address


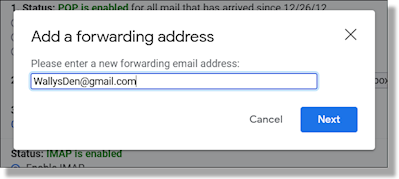
- Enter the address you would like to forward emails to and click Next. Google will send a verification code to that address

- In your other email account, open the verification email and copy the confirmation code

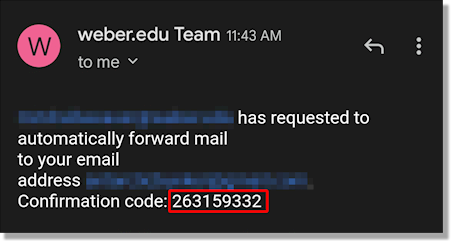
- Back in the student email settings, enter the confirmation code and click Verify


- Select "Forward a copy of..."


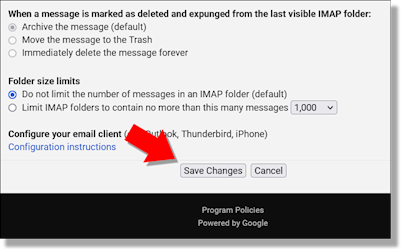
- Finally, be sure to click Save Changes at the bottom of the page

Congratulations, you can now view emails sent to your student account! Remember that you cannot send student emails through this method; you will need to log into the account through a browser.
Canvas Calendar Sync
Sync your Canvas calendar to have assignment due dates show in your personal calendar
Google Calendar
- Log into Canvas from a desktop/laptop browser
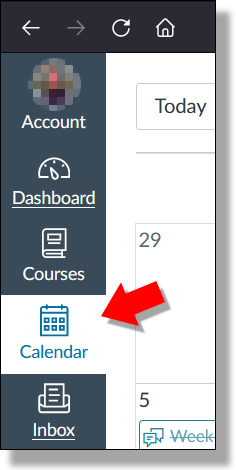
- Click Calendar on the sidebar

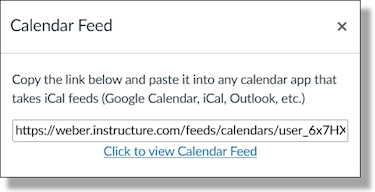
- On the right, click Calendar Feed


- Copy the URL shown in the box

- On the left side of your Gmail Calendar page, click on the plus sign next to "Other calendars"

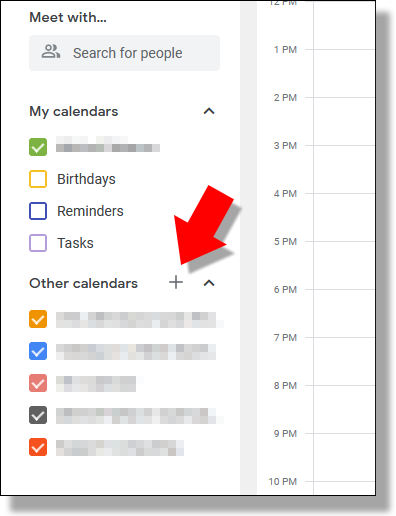
- Paste the URL that you got from Canvas into the field here and click Add calendar
.png/cg2(1)__425x234.png)

Congratulations, you will now see assignment deadlines in your personal calendar!
Apple calendar app
- Log into Canvas from a desktop/laptop browser
- Click Calendar on the sidebar


- On the right, click Calendar Feed


- In the Calendar app, click File and then click New Calendar Subscription
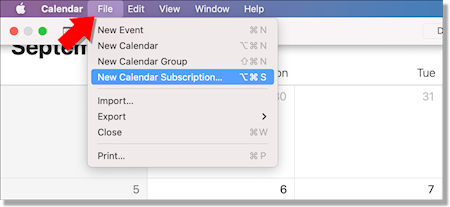
- Paste in the URL from Canvas and click Subscribe

Congratulations, you will now see assignment deadlines in your personal calendar!

