

Downloading and installing the VPN
-
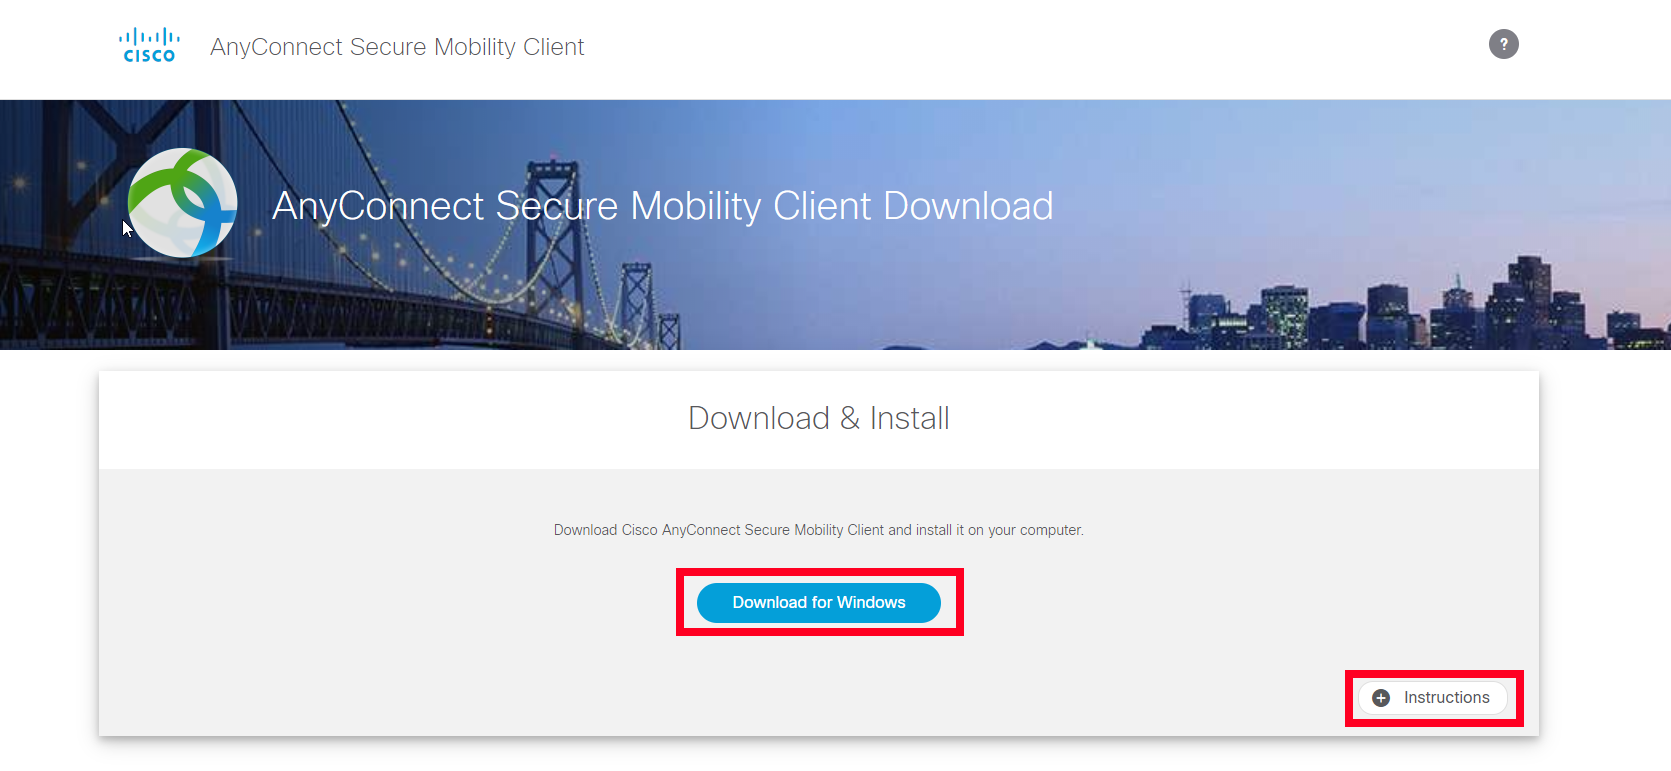
Open your internet browser of choice and navigate to vpn.weber.edu
-
Clicking the instructions button will open step by step instructions at the bottom of the page to help install the client
Click here for usage instructions for Mac users
Using the VPN & Connecting to Your Computer from Home (PC Instructions)
You will need the following information:
-
Your CAS Username and Password
-
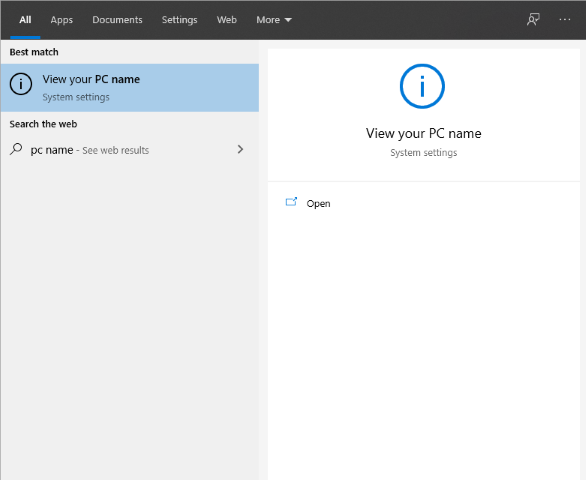
The name of your desktop computer:
-
In order to get the name of your desktop work computer, while logged into your work computer click in the search box in your tool bar or open your start menu and start typing "PC Name"

-
Select the option to "View your PC Name"
-
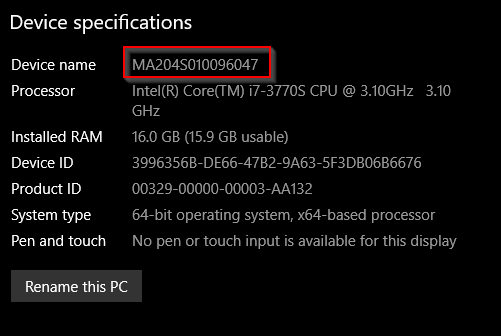
In the box that opens you will see your device name as shown inside the red box below.
-
Using the VPN
-
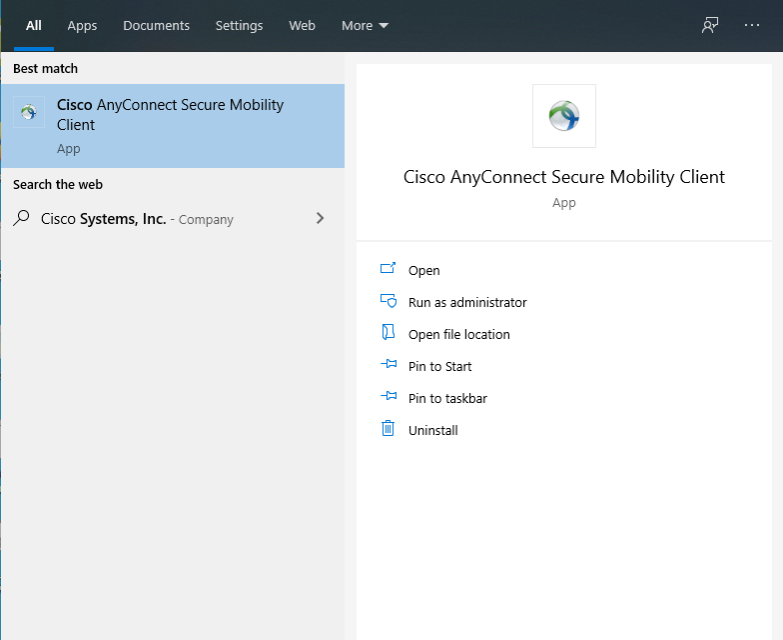
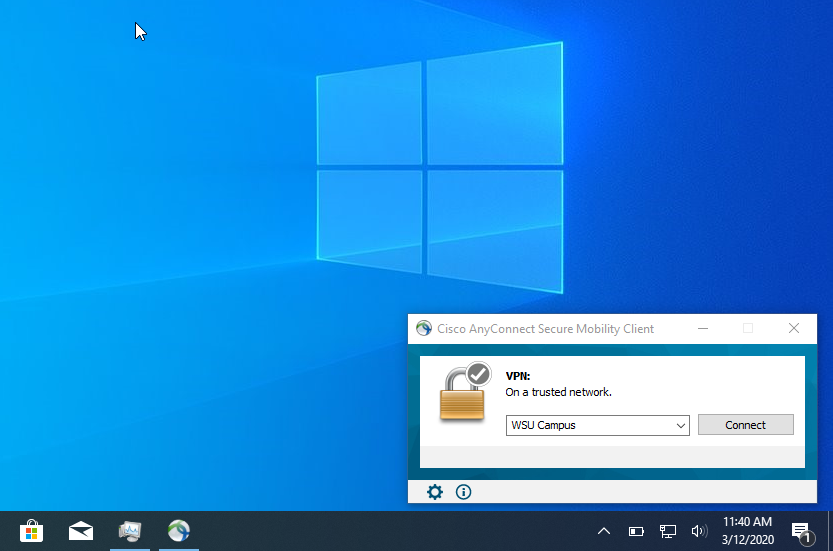
Open your start menu or type in the search box to find the Cisco AnyConnect Secure Mobility Client and launch it.
-
You will see a box for the clien in the bottom right of the screen. Click the Connect Button.
-
A web browser will open and ask you to login with your CAS (eWeber) credentials. After logging in you will be successfully connected to the network!
-
-
Connecting to Your Desktop Computer
-
Ensure you are connected with the VPN as described above.
-
With the search box or start menu find the Remote Desktop Client.
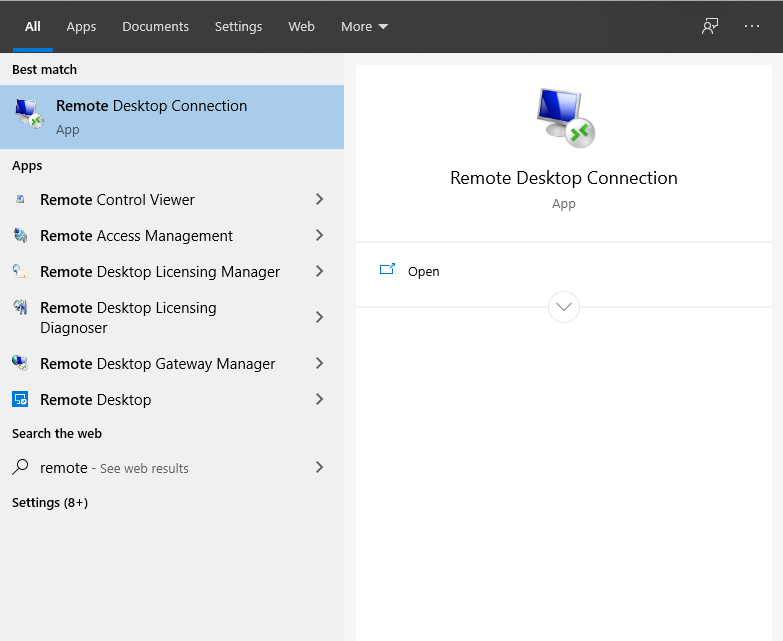
-
Once the client is open input your computer name followed by ".users.weber.edu" for instance MA204S010096047.users.weber.edu

-
You will be asked to login with your normal login and then you will be connected to your work computer.
***IMPORTANT*** - If this is your personal computer, YOU MUST DISCONNECT THE VPN TO CONTINUE DOING PERSONAL WORK WITH YOUR COMPUTER.
-
To disconnect, click the “Disconnect” button in the Cisco window or click on the Cisco AnyConnect taskbar icon in the upper right of your screen and select “Disconnect”
Using the VPN & Connecting to Your Computer from Home (MAC Instructions)
-
Connecting to the VPN
-
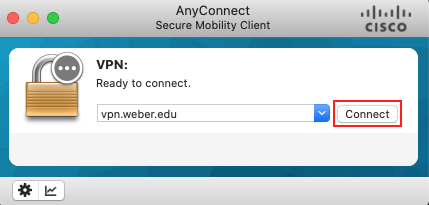
Open the Cisco AnyConnect Secure Mobility Client app.
-
Open a Finder window by clicking on the Finder icon in the dock and click “Applications” in the left hand column. If you do not see “Applications” in the left hand column, use the keyboard shortcut shift+command+A. Click on the folder labeled “Cisco”. You may have to scroll down to see it. Double-click the app named “Cisco AnyConnect Secure Mobility Client”
-
Click the “Connect” button across from “WSU Campus” or “vpn.weber.edu"
-
If the Cisco app shows that you are connected, you are now a part of the secure Weber State network, and you may work on whatever you would when in your office.
-
Getting Your Mac's Name (Needed for remote access)
-
On your work Mac click the apple icon in the upper left and click System Preferences then click the Sharing icon.
-
The box at the top of the window will contain the hostname of your Mac

-
-
Remote Login to MacOS
-
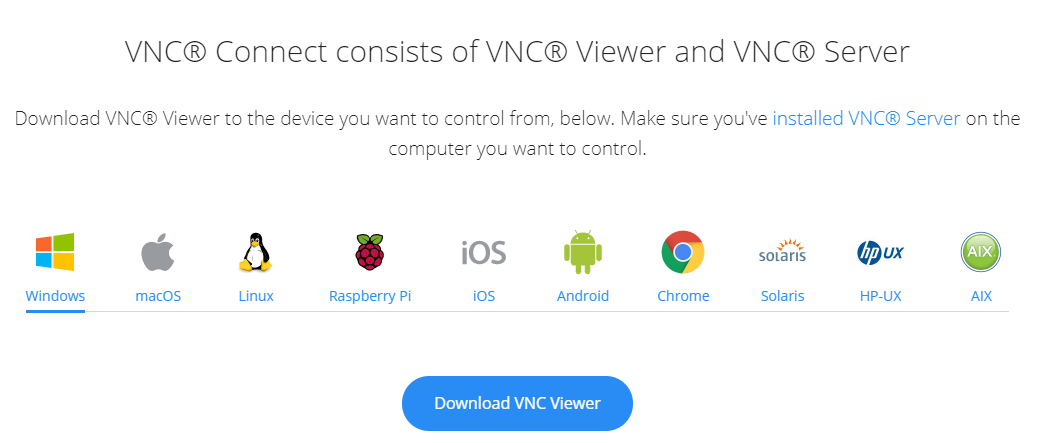
Download and install VNCViewer on your computer or Mac via: https://www.realvnc.com/en/connect/download/viewer/
-
Open VNCViewer.
-
Navigate to File > New Connection.
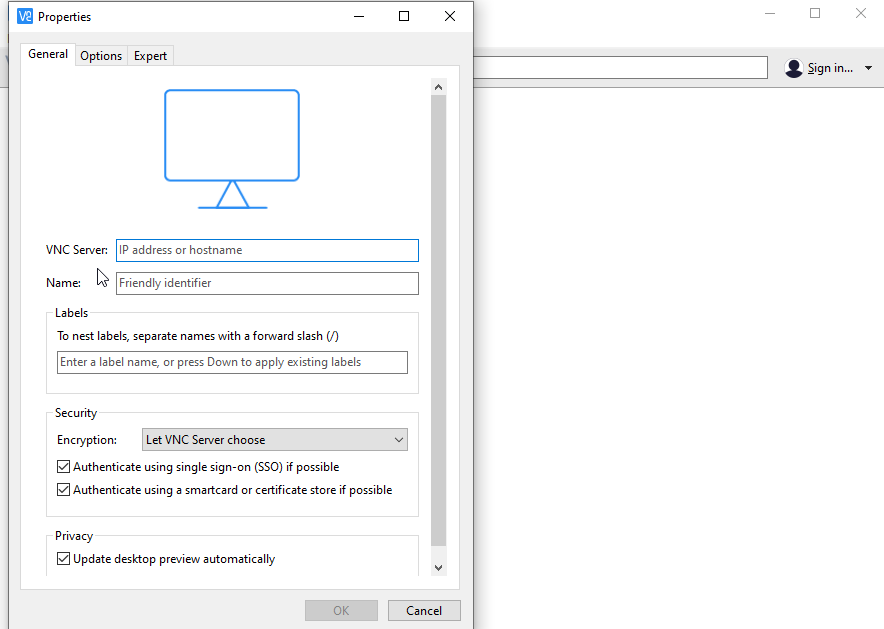
-
In the VNC Server text box, type in your Mac’s name that was displayed in the Sharing menu. This address will be the Mac’s name with "users.weber.edu" added to it (ex. MA204SWS01010.users.weber.edu). Click “OK”.
-
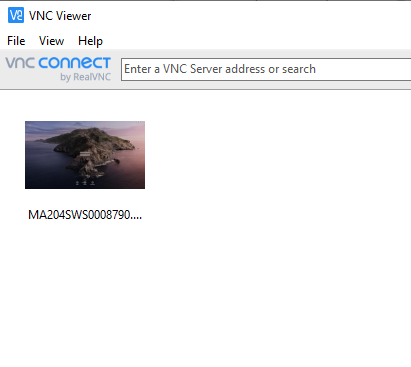
Double click the newly added connection on VNC’s main menu
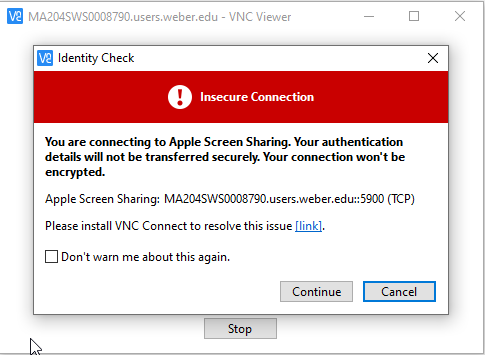
-
Click “Continue”
-
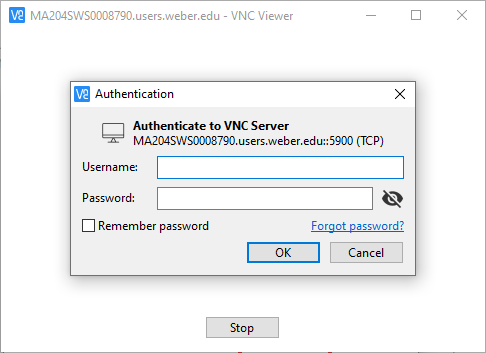
Enter your Weber State Credentials and click “OK”:
-
Location
Building: Miller Administration
Room: 204S
3850 Dixon Parkway Dept 1014
Ogden, UT 84408-1014 -
Hours
Mon-Fri: 7:30am to 4:00pm
Sat-Sun: Closed
University Holidays (PDF): Closed
-
Contact Us
Financial Services Staff
Phone: (801) 626-7288
Email: fs-techsupport@weber.edu
Students/Faculty
Web: WSU IT Service Desk -
Important Links
Change eWeber Password
WSU IT Security Policies
WSU Current Security Threats